
Creating caption files for post production or replay is now even easier with our new support for Caption Tools directly in the StreamText Dashboard. Now you can easily export and edit your recorded captions for replay and use with various video platforms.
To use this feature you will need to have your events saved to our servers. By default we do not save your files so you will need to retain your transcripts to use this feature.
There are two options for saving your transcripts.
1. Select the "retain transcript" check box on the security tab when you schedule an event. When this is selected the transcript will be saved to our servers.

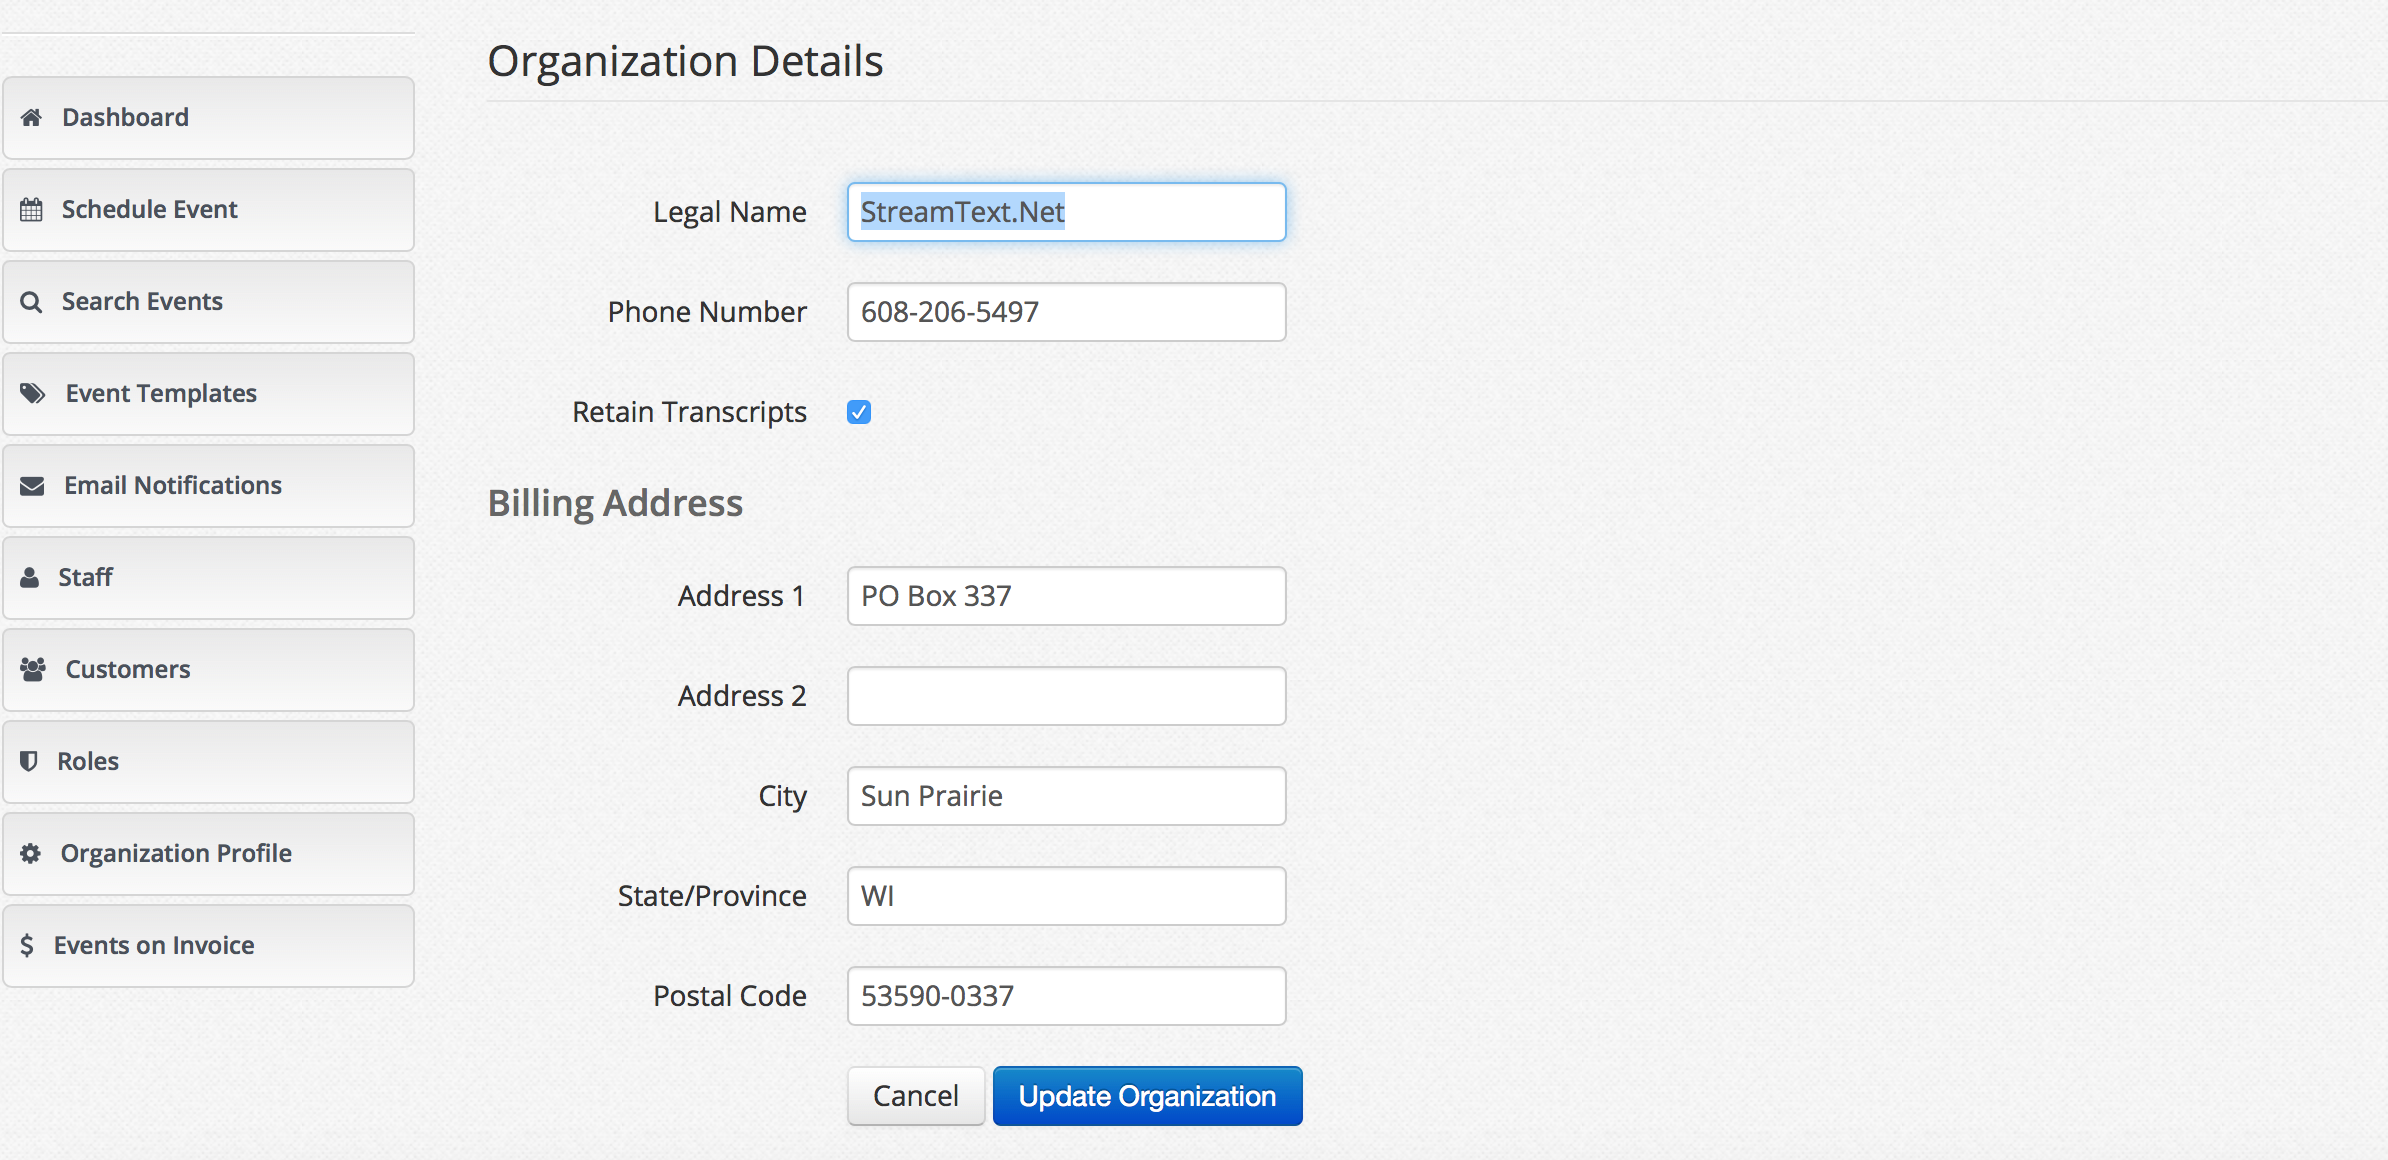
2. You can also set all your StreamText events to save transcripts. Go to "Organization Profile" in the left hand menu. Then click on edit. You will see a check box to "retain transcripts" just select that and update your organization.
3. Next you will lookup your event to edit. You can use Search events to lookup previously recorded events. You will see a "View All Transcripts" link under competed events that have their transcripts saved to our servers.
4. Now click on "Edit Transcript" in the upper right hand corner to open up the editor.

5. The editor should be open now and it should look something like this.
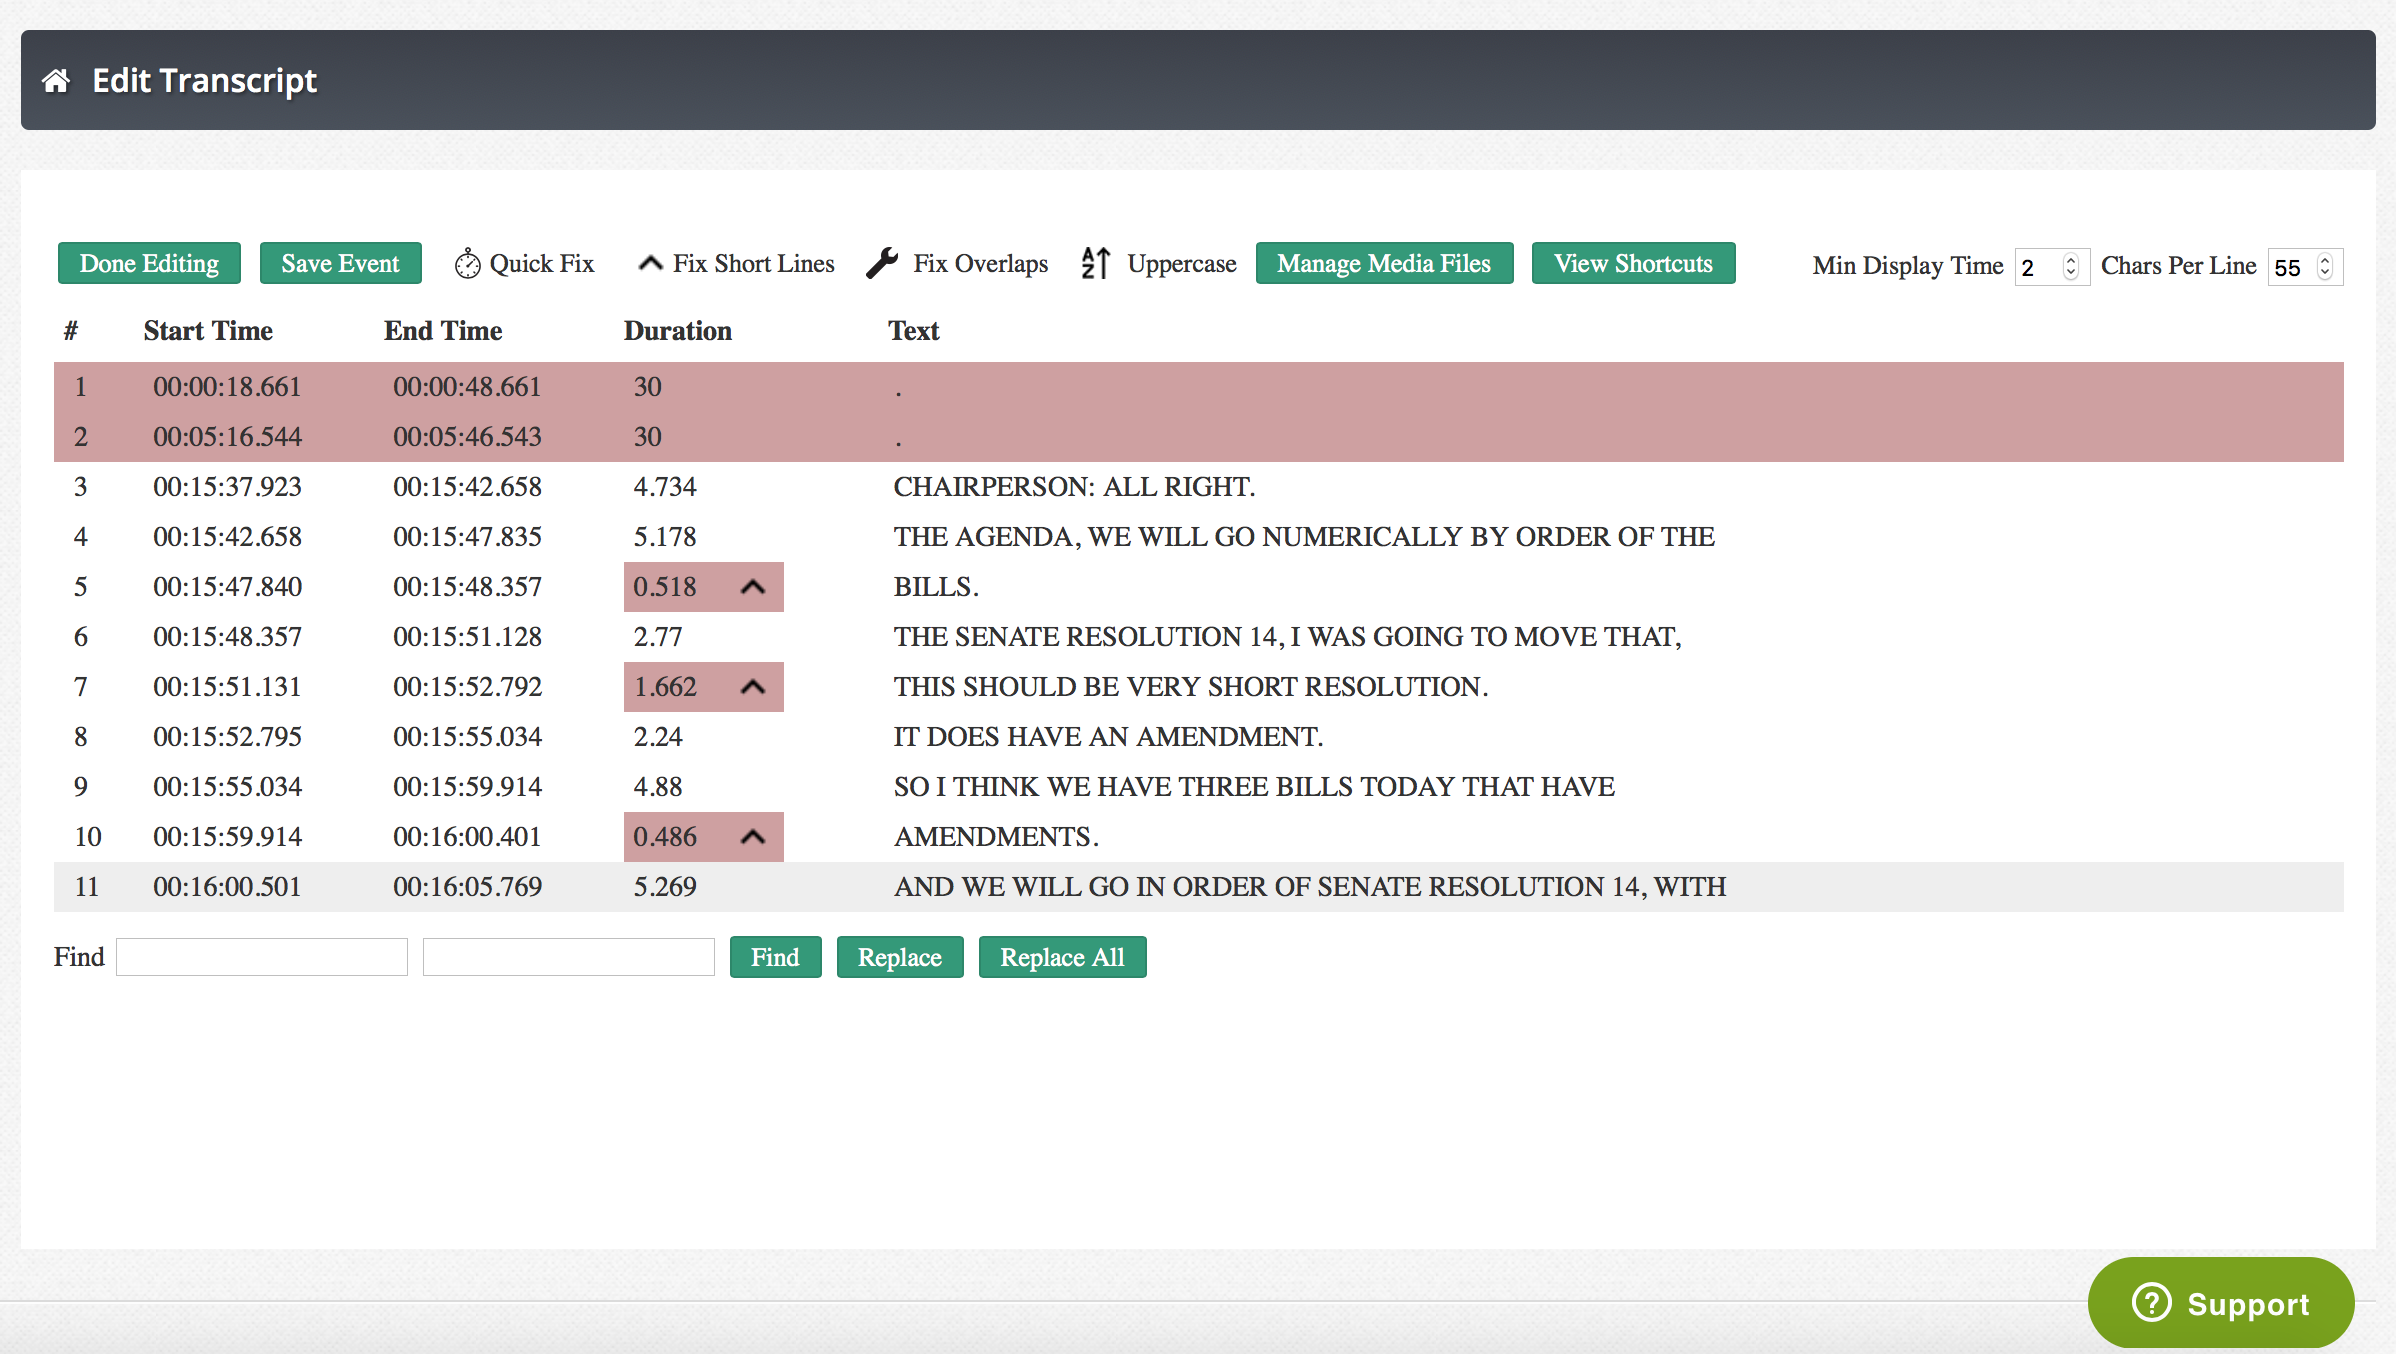
So now that you have the file pulled up below are the basic steps for editing the file. Note there is quite a bit of complexity in what you can do with the editor. This will cover the basics for a standard file. There will be more tutorials for more complicated formatting presented on our FB page.
- Delete any “test” lines or extra lines at the beginning of the file. (Click on the “edit” icon just to the left of the text you want to delete, then CONTROL DELETE.) To delete multiple lines at once, after clicking the first line to delete, hold down the SHIFT key and click on the last line to delete. Once all lines to delete are highlighted in red, hit the DELETE key.
- Enter the start time for the first word spoken.
- Click on the “Quick Fix” in the editor menu . Enter the exact time code the first word is spoken, adjust the minimum duration (should be between 1 and 2 seconds) and the desired number of characters per line. Click the green Quick Fix button to complete.
- Click SAVE EVENT. This saves the edits and also generates the caption files for export.
- Click DONE EDITING to exit the file.
- Download the edited files they will now be displayed when you click on view transcripts for that event.
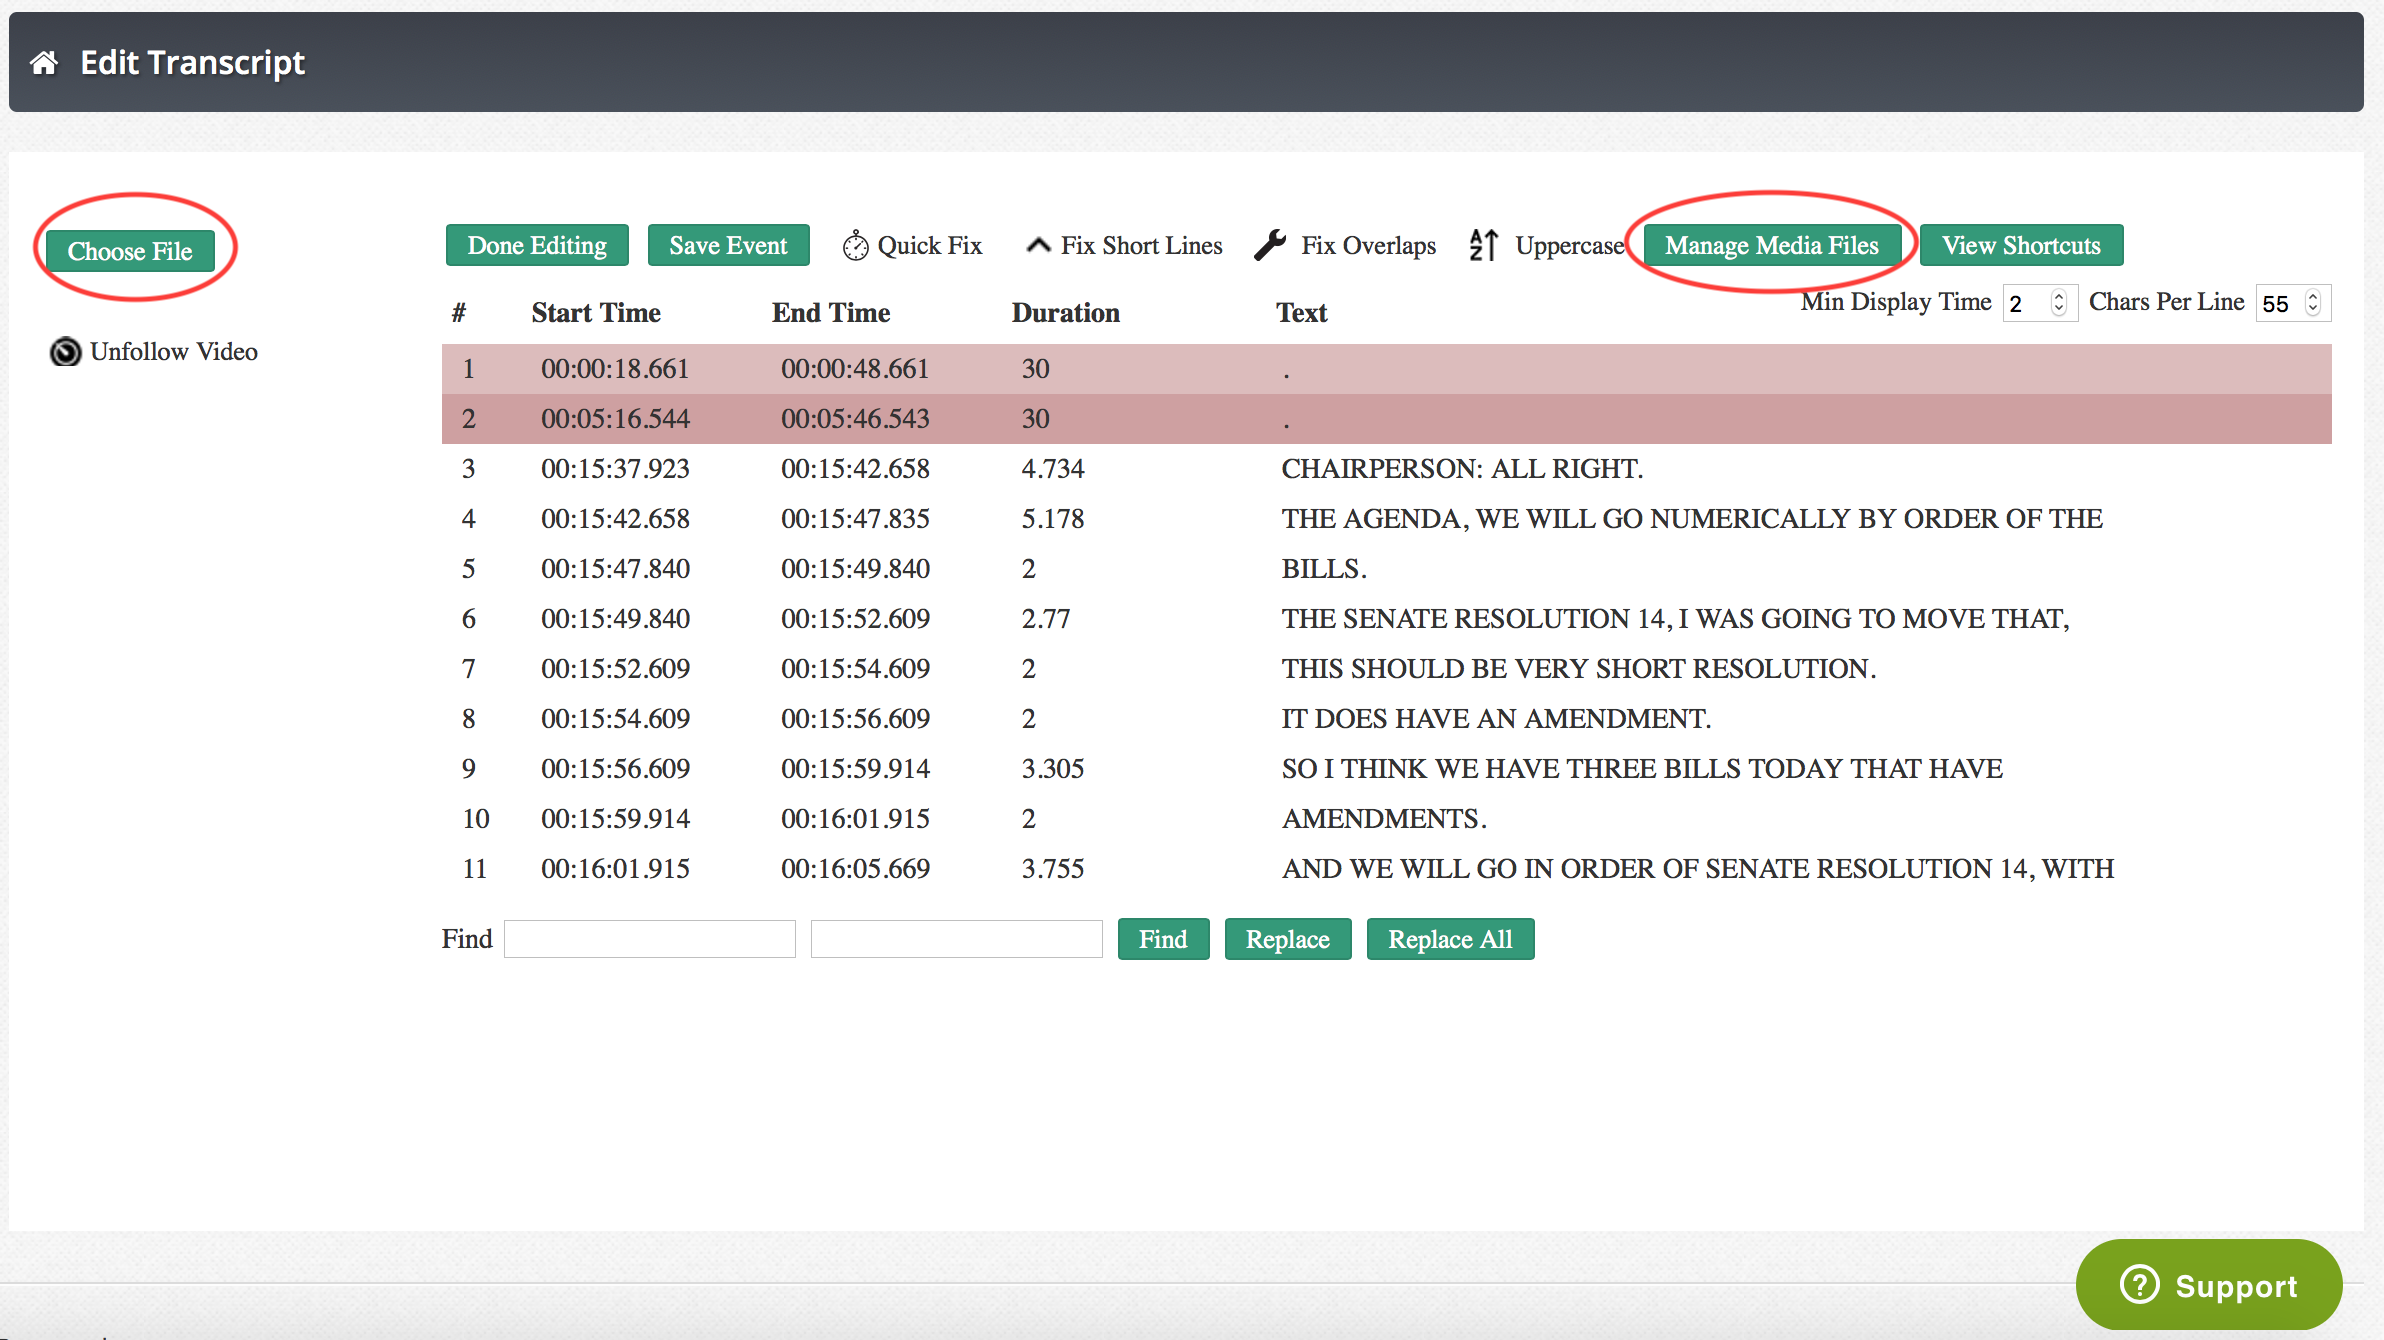
If you have access to the media file then you can also upload it to use with the editor. Click on "Manage Media Files" in the top menu on the editor. Then select choose files in the upper left to select a file from your computer. When you have the file uploaded you can play it and it will highlight the captions. This is a good tool to used to spot check a file before you send it out to a client
.
0 Comments